
Firmware Upgrade Guide
Keep your AUFIRE equipment running at peak performance.
This guide will walk you through updating the firmware on your AUFIRE receivers and remote controllers via the built-in USB port. Please read through all instructions before beginning the upgrade process.
WHAT YOU'LL NEED
FIRMWARE UPGRADE UTILITY
Download the appropriate BOSSAC GUI tool for your operating system:
Firmware Upgrade Utility (Windows 10/11) - DOWNLOAD LINK
Firmware Upgrade Utility (Macintosh) - DOWNLOAD LINK
⚠️ Windows Users: You may see a virus warning when downloading the BOSSAC GUI utility. This is a false positive — the warning appears because the utility is not a Microsoft-signed program. You can safely proceed with the download and installation.
IDENTIFY YOUR HARDWARE VERSION
Before downloading firmware, you must determine which generation of hardware you have. The USB port type is your key identifier:

AUFire Remote
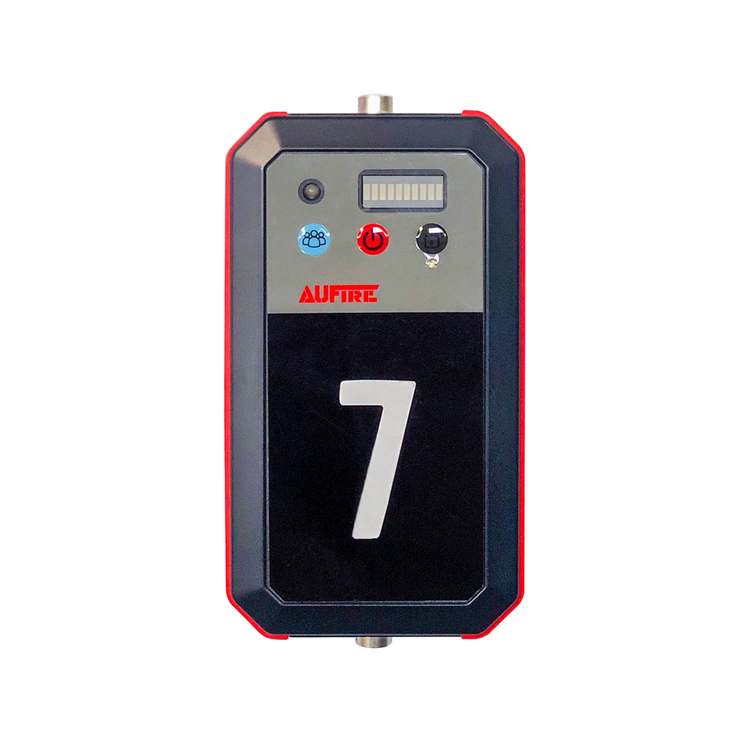
AUFire Receiver
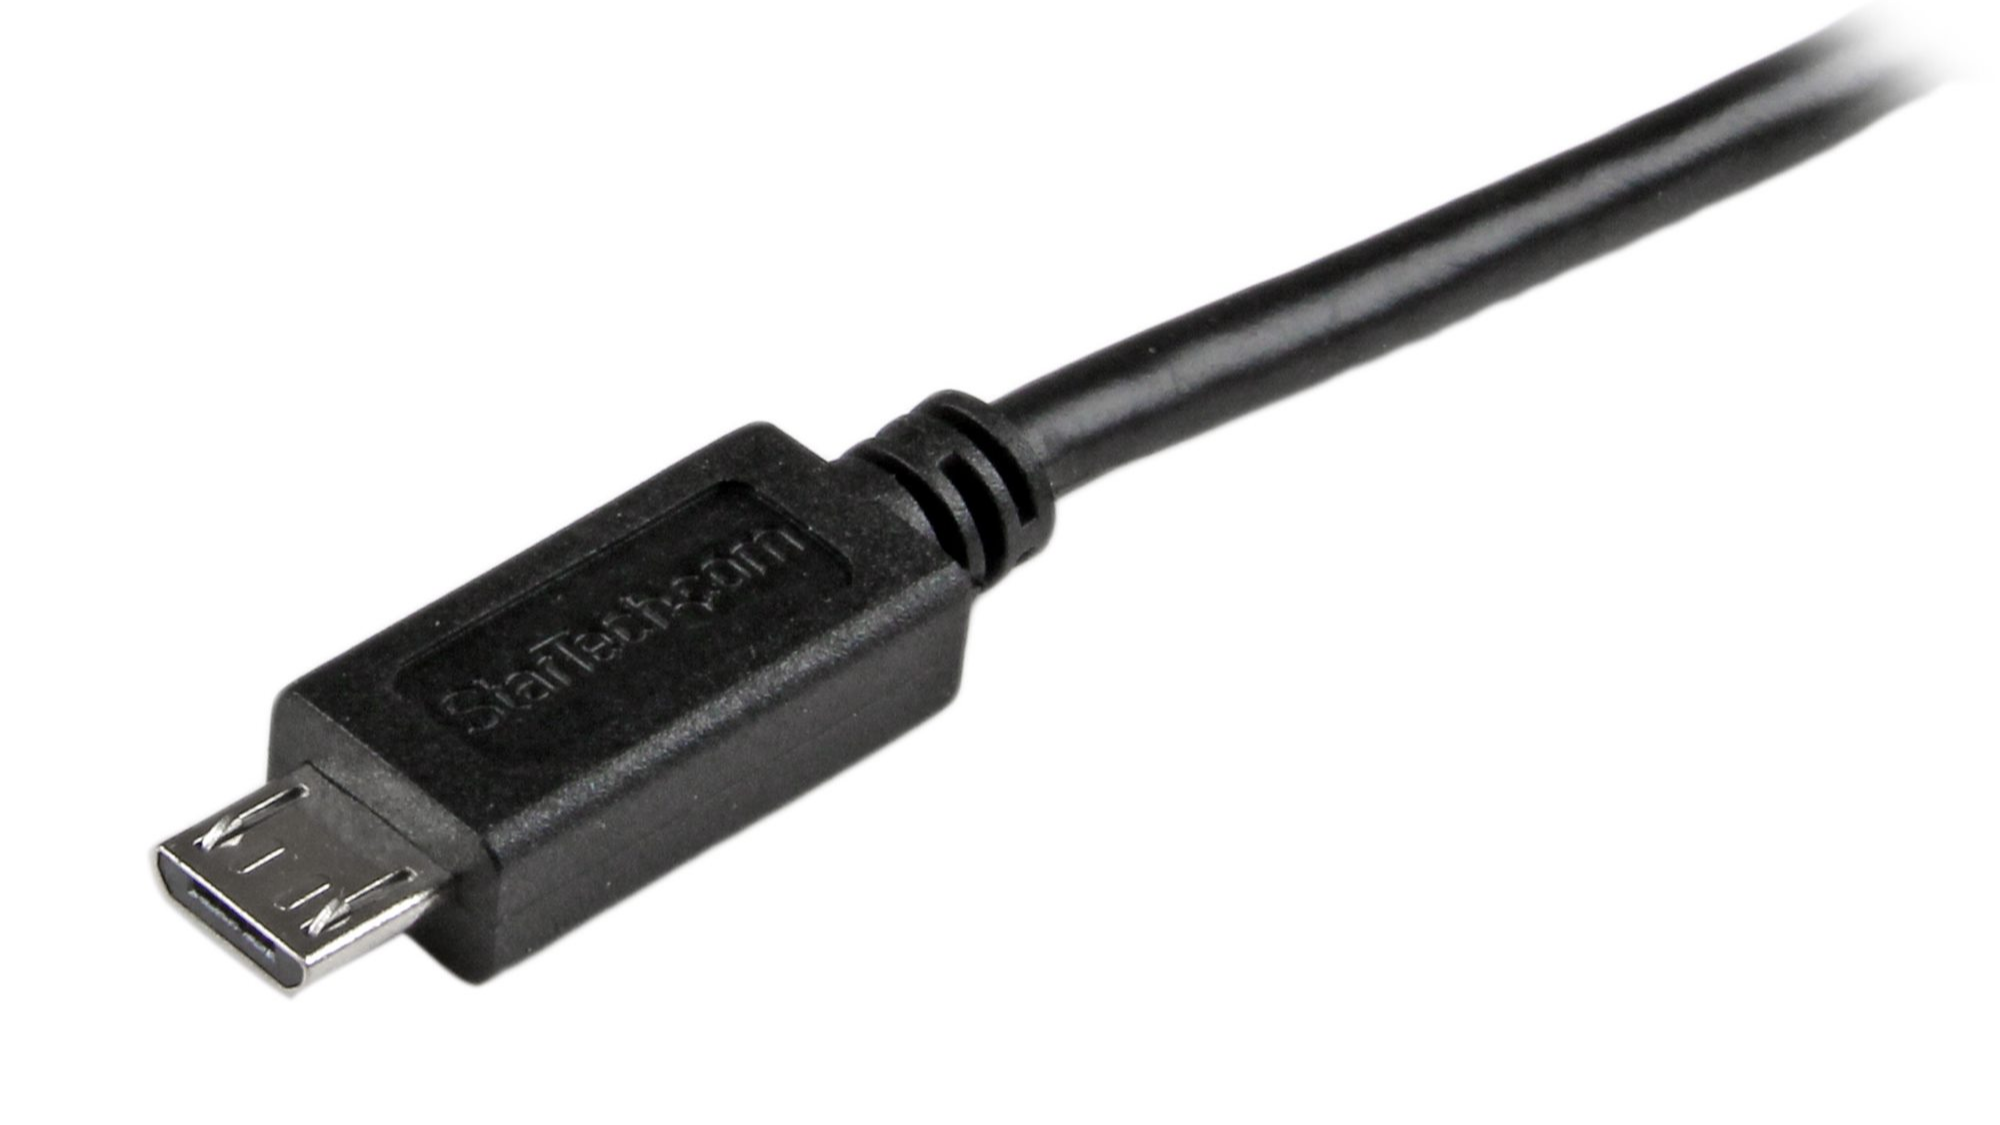
Version 1 Hardware
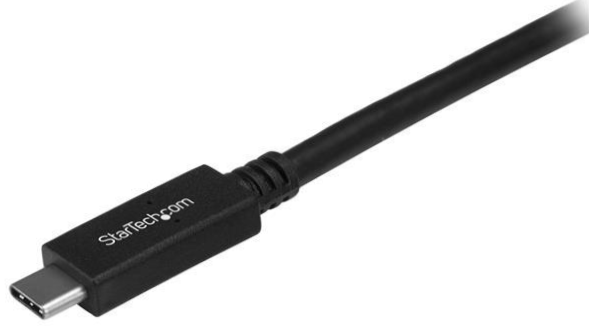
Version 2 Hardware
Uses newer USB C style plug.
NOTE: You must use a proper USB cable for the upgrade to work properly. We recommend only using the USB firmware upgrade cables obtained from AUFire, or a quality USB C to USB A cable, not just a charging cable.
Latest:
🚨 CRITICAL: Using the wrong firmware file may damage your hardware and require return to AUFIRE for service. Double-check that you are uploading Remote firmware to your Remote and Receiver firmware to your Receiver.
INSTALLATION & SETUP
WINDOWS INSTALLATION
Download the Windows BOSSAC GUI tool
Extract the ZIP file to your desktop or preferred location
The utility is now ready to use — no formal installation required
MAC INSTALLATION
Download the Mac BOSSAC GUI tool
Double-click the DMG file to open the install window
Drag the BOSSA_GUI file into your Applications folder
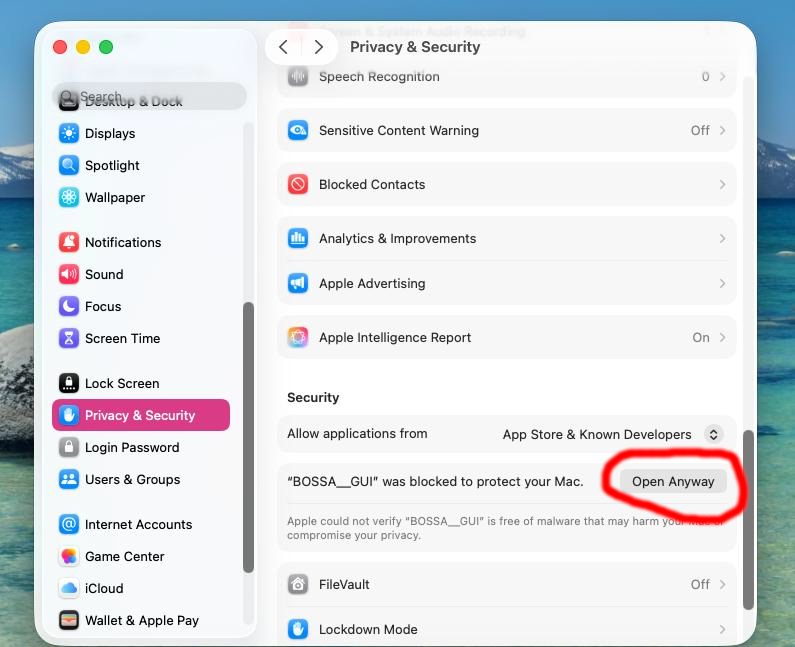
ℹ️ First Launch on Mac:
The first time you run BOSSA GUI, macOS will block it as a downloaded application. Go to System Settings → Privacy & Security and click Open Anyway to allow the app to run. After this initial step, you can launch it normally from your Applications menu.
UPGRADE PROCEDURE
STEP 1
CONNECT YOUR HARDWARE Connect your AUFIRE device to your computer using the appropriate USB cable (micro USB for GEN 1, USB-C for GEN 2).
Power on the device by pressing the power button.
Receiver: Verify the power LED is illuminated
Remote: Confirm the AUFIRE logo appears on the screen
STEP 2 - LAUNCH BOSSAC GUI
Run the BOSSAC GUI tool:
Windows: Double-click the .exe file
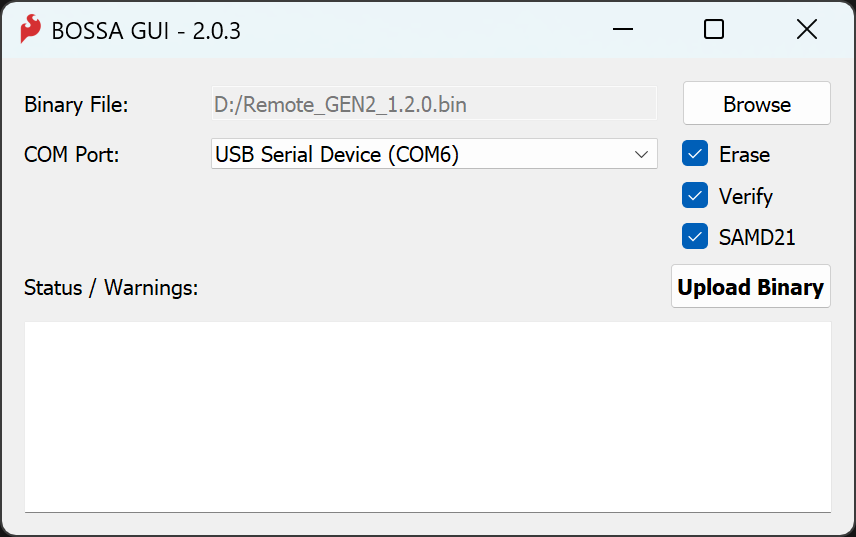
Mac: Open from your Applications menu The utility window will appear:
STEP 3 - SELECT YOUR FIRMWARE FILE
Click the Browse button and navigate to the firmware file you downloaded.
Firmware files follow this naming convention:
Receiver_GEN#_V#.#.#.bin — for Receiver units
Remote_GEN#_V#.#.#.bin — for Remote units
STEP 4 — SELECT THE CORRECT COM PORT
From the COM Port dropdown, select the port labeled "USB Serial Device".
💡 Tip: If you have multiple USB devices connected and are unsure which port to select, unplug your AUFIRE device, check the dropdown list, then plug it back in and observe which new port appears.
STEP 5 — CONFIGURE SETTINGS & UPLOAD
Before uploading, verify the following checkboxes are selected:
☐ Erase
☐ Verify
☐ SAMD21
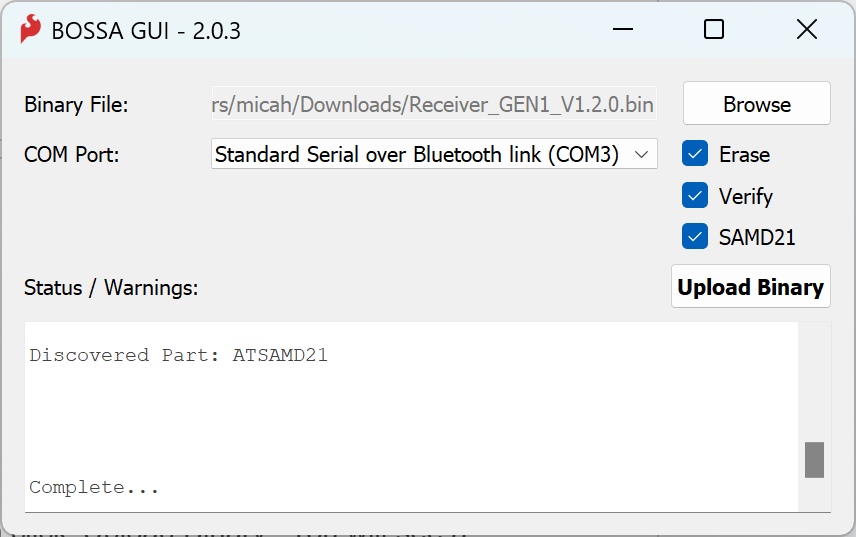
Click Upload Binary to begin the firmware transfer. The Status/Warnings window will display progress messages as the upgrade proceeds. This process takes approximately 30 seconds.
When complete, you will see "Complete" in the status window. Your device is now running the latest firmware.
NEED HELP?
If you encounter any issues during the upgrade process, we're here to assist you.
TROUBLESHOOTING TIPS
Ensure your device is powered on before starting the upload
Try a different USB port on your computer if the device is not detected
Verify you selected the correct COM port in the GUI
Confirm you are using the correct firmware file for your hardware version
CONTACT SUPPORT If you continue to experience issues, please contact us:
Email: info@aufire.com
Visit our Contact Page: aufire.com/contact
💡 Speed Up Your Support Request: Include a copy of all text from the Status/Warnings window in your email. Simply select the text with your mouse, copy it, and paste it into your message. This helps us diagnose the issue quickly.